Custom Menus

  1. Start at your site’s Dashboard and choose Appearance the Menus.screen shot of appearance menu
  2. In the Custom Menus interface that appears, type a name for your menu. This can be anything you want. It doesn’t get displayed anywhere; it’s used by WordPress to identify and place your menu. Once you’ve typed the name, click Create Menu.
  3. You’ll now be presented with a screen that includes a section titled Menu Settings. This is where you’ll indicate where you want your menu to appear in your theme. The number of locations available depends entirely upon the theme you choose. In the example shown below, there are two areas available; we’ve chosen to place the menu in the Top primary menu area which we know corresponds to the header menu. You may need to experiment a bit in order to find out where your menu will appear in your theme. You can always change this location later by coming back here and clicking the Manage Locations tab.
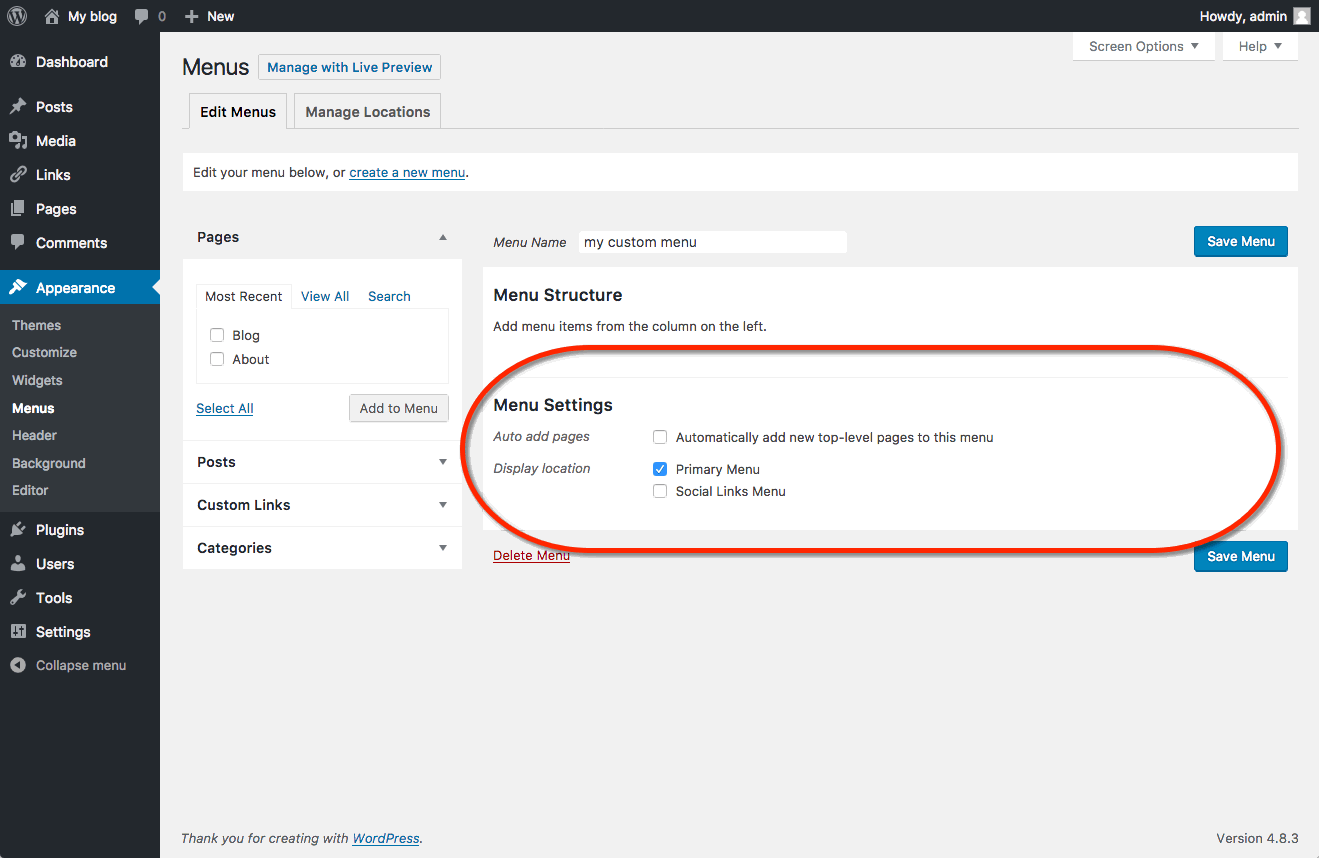
    custom menu settings
  4. Now that you’ve set up your menu and assigned it to a location, you can begin to add links to it. On the left-hand side of the screen, you’ll see what content is available to add. On the right-hand side of the screen, in the Menu Structure area, you can arrange and organize your links.
  5. By default, you may not see everything that is available to you to add to your menu. For example, posts can be added to menus, but they’re not usually displayed by default. To make more content available, click the Screen Options tab at the top of your WordPress screen, and then click off the check boxes that correspond to additional content.custom menu screeen options
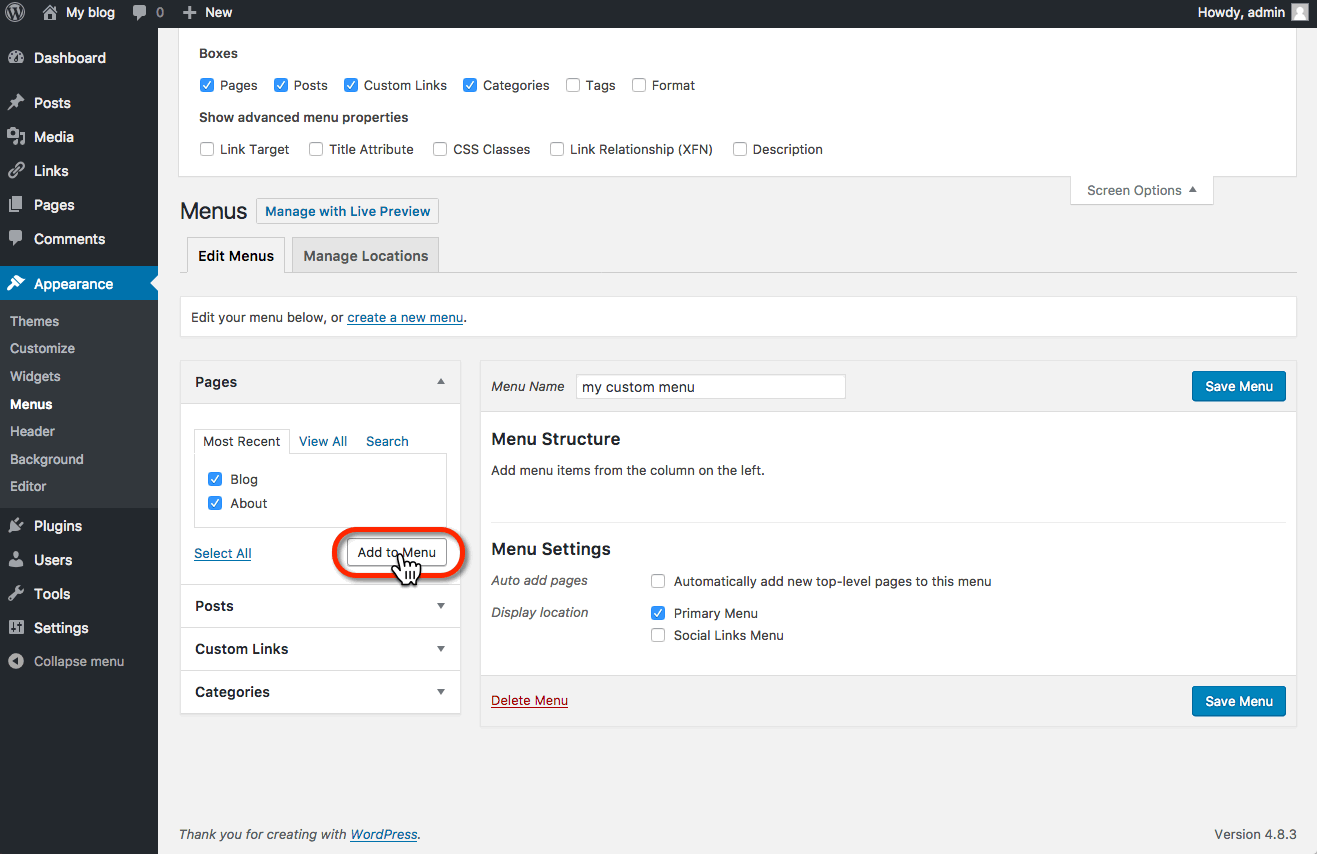
  6. To add content to your menu, simply check it off on the left, and click the Add to Menu button.add items to custom menu
  7. Your new content will appear on the right, and you can drag items in the order you want them to appear. Drag items to the right to indent them under other items. This will usually make them appear as drop-down items in your menu.
  8. You can add custom links to your menu by clicking the Links section on the left. In the short form that appears, enter your link’s URL, and a text for the link. Click Add to Menu to move it to the left.Change navigation labels on your custom menu
  9. Note that you can change the link text of any item you add to your menu. This can be helpful if you have a page with a long title, and you’d like the link to not take up so much space. You can abbreviate the title in the Navigation Label section, and that shorter text will become the actual menu link.
  10. When you are done, make sure you click Save Menu.

Other Notes about Menus

When you add a Category or Tag to a menu, the link will take your readers to an archive of all the posts on your site that use that category or tag. This can be a very useful feature for organizing your content when you’re using posts to share your work.

In addition to assigning Custom Menus to theme areas, there is a default Custom Menu widget that you can put in the sidebar of your site. This is useful for creating smaller, customized navigation for your site.

If you forget to click Save Menu after making changes to your menu location or content, you will lose your work!

Privacy

What you add to your createuky.net webspace rests entirely with you. You can choose not to pick a domain that reveals your name. You can use a pseudonym on your actual site. However, when you sign up through the default process, your name does get published as part of the public record about your domain name. Anyone can find it by looking up details about the ownership of that domain name through a public “Whois” request.

This is NOT an issue if you’re already planning on using your name openly on your site (in your domain name or elsewhere). This option is aimed, specifically, at those who, for whatever reason, feel they want to take every precaution to hide their identity on their site.

Managing Spam: Akismet

SPAM! Everyone hates it in their email. If you’re new to WordPress and blogging platforms, spam exists in the form of comment spam – people (or vermin) leave comments promoting their services or schemes, on a post or page.

So how do you deal with comment spam when it can come in even more often than email spam? Do you have to delete every comment that comes in? Well, the answer to the second question is “no”, and the answer to the first question is, with a plugin called Akismet.

  1. To get started we need to install a plugin. To do this, we’ll start at the Dashboard.Screen shot of WordPress Dashboard
  2. Navigate to Plugins > Installed Plugins.Screen shot of Akismet on plugins menu
  3. At or near the top of the list of plugins that are automatically installed in a new WordPress installation, is Akismet. It is not activated, so part of the process of getting Akismet is Activating the plugin. Before you activate it, however, you need to get something that will be somewhat strange for most people. It’s called an API key. API stands for Application Programming Interface, and it’s a way for programs and services to “talk” to each other. The Akismet plugin requires you to get an Akismet API Key, which is simply a “code” that you supply when activating the plugin. The key is free if you use it on a personal WordPress installation, and it’s available on the Akismet website.screen shot after activating Akismet
  4. Once you arrive on the Akismet for WordPress site, click the Get an Akismet API key button.Screen shot of Akismet web site where you get key
  5. If you have an account at WordPress.com you can sign in with that login and get your key. Otherwise, fill in an email address, a username, and a password to use for a new account. Click the Sign up button to proceed.
    create a wordpress.com account, if you don't already have one
  6. Type in the URL of the site you’ll use Akismet on and click on the Sign Up button under the Personal plan (that is if you want it to be the free version).Select desired Akismet plan
  7. When you get to the next page, the recommended contribution is $36. You can adjust the slider down to $0. The smiley face will begin to frown, but at least your key will be free. Lastly, fill in your name and click Continue.
  8. You’re finished with the sign-up process for your key, and it will be displayed on the page for you (we’ve blurred ours out).Akismet key
  9. Now follow the steps that they show you for using your new key. You will enter the key in either the Akismet area under Plugins or JetPack (if you have that installed).Akismet key

Reading Settings – Front Page

WordPress is a very flexible platform for creating full-blown websites, not just blogging sites. This page will show you how to change the “front page” of your website.

As we have said before, WordPress provides two primary content types for you two work with: posts and pages. Posts, as in blog posts, are a somewhat complex form of a webpage. Each blog post gets published in reverse chronological order, on the front page of a WordPress site. You write a new post, and it gets published at the top of the front page. Pages are a more static form of content. They are additional areas to put information that doesn’t change much. So what if you would like to make the front page of your WordPress site based on a page instead of your blog posts?

  1. Start at the Dashboard.Screen shot of WordPress Dashboard
  2. Navigate to Settings > Reading.screen shot of WordPress reading settings
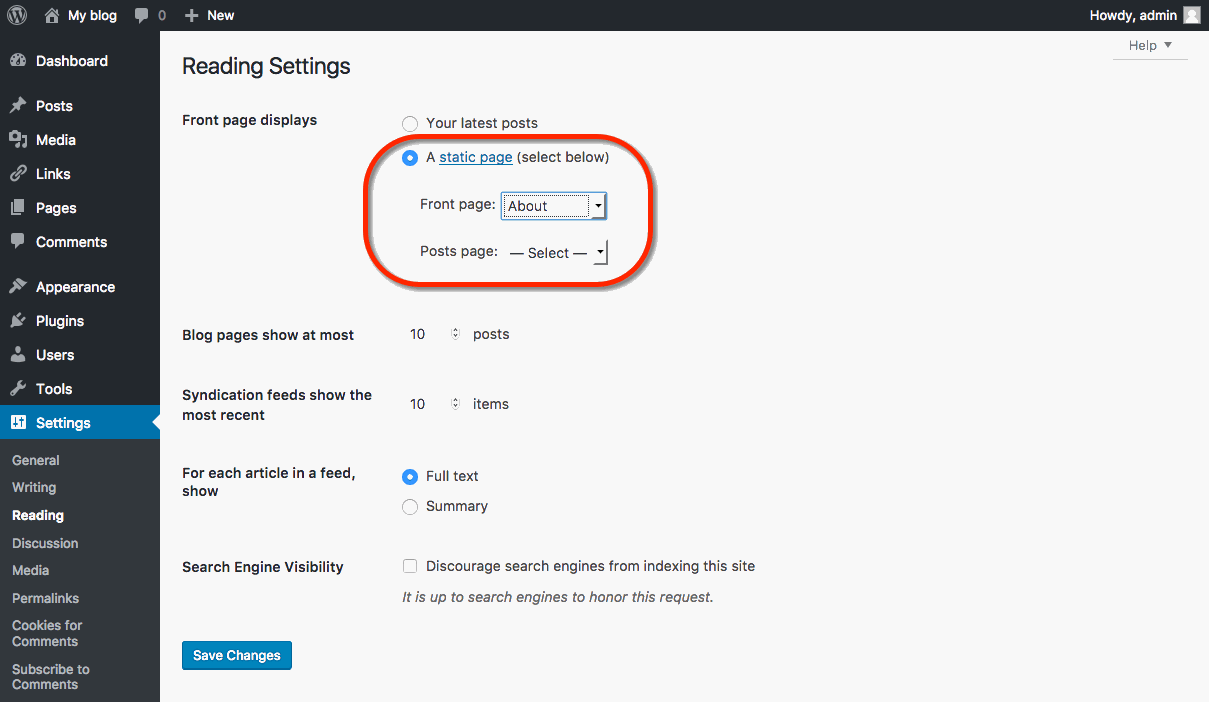
  3. Normally, the front page displays your latest blog posts. What we want to do instead is select a Page from the website. Obviously, this page has to exist before you can select it. Select the “A static page” radio button and choose the About page from the Front page drop-down menu (an About page was created for you when you installed WordPress). Press the Save Changes button and now you will have the “About” page as your Front page. Edit it as you see fit and provide a good welcoming page for your visitors. screen shot of Word press reading settings
  4. But wait. What will happen to your blog posts? Most people will want them as the “dynamic” part of your site. First, create a new Page.screen shot of
  5. Title it Blog (you can title it whatever you want but Blog is common and descriptive). Leave the page blank (don’t type any text in the edit box) and Publish it.screen shot of adding a new post
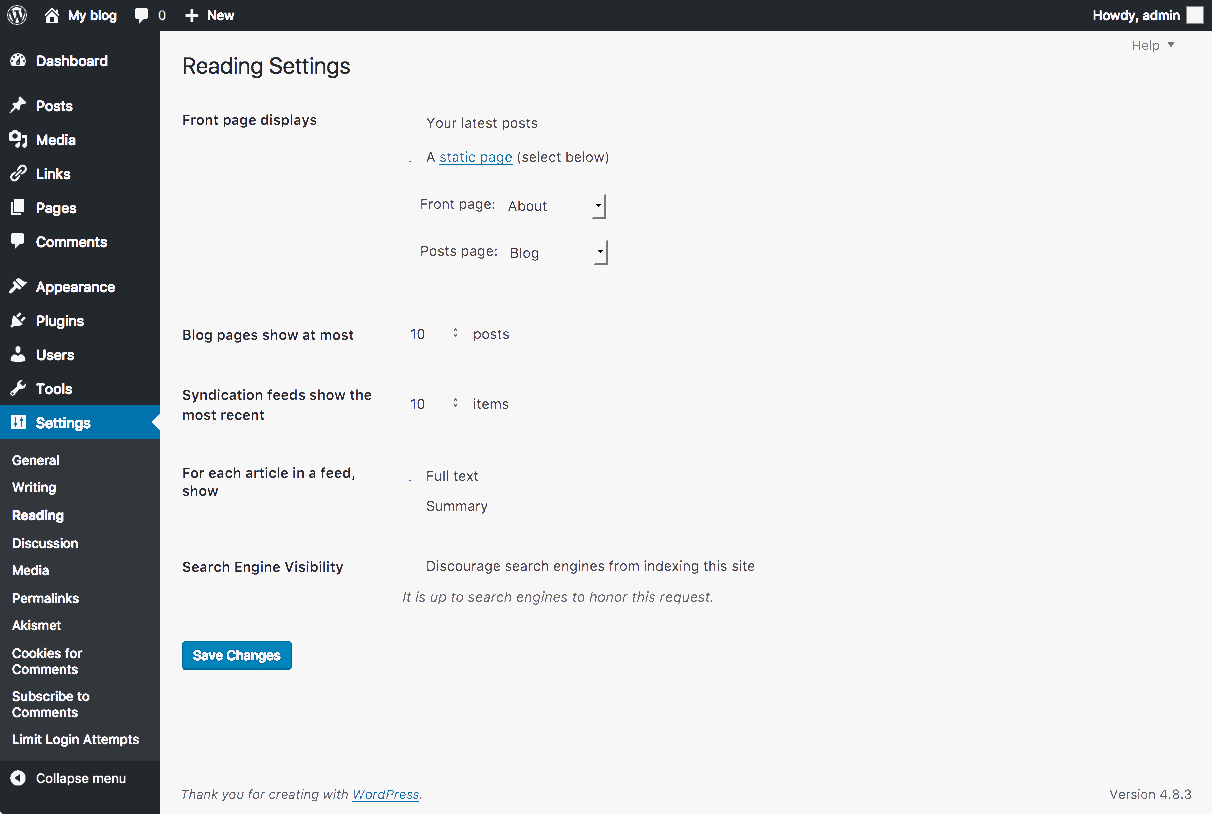
  6. Now go back to Settings > Reading. Under the static page area choose Blog from the Posts page drop-down.select new WP post page
  7. Click the Save Changes button. Now your “home” page will actually display the About page. You will also have a Blog item in your menu (depending on your theme, you may have to customize your page display to see pages).
  8. If you click on the Blog menu item, you will then see your blog posts. Notice the /blog added to the web address.

Unlock your domain

This article only if you own your own top-level domain. If you have been using the free subdomain option with createuky.net through University of Kentucky, this does not apply to you.

Similarly, if you’re migrating your content to Reclaim Hosting, this article does not apply to you.

Transferring a domain you already own is not too much different from registering a new domain, except the transfer process requires an EPP code, or an agreement code between your old registrar and your new registrar that allows the release of your domain. Your new registrar will have information on how to transfer in a domain. When you start that process, you will be prompted to enter your EPP code.

How to find your EPP Code:

  1. To get started you’ll need to login to your control panel (https://createuky.net/dashboard) using your Haverford username and password.
  2. Once you’re logged in, you’ll see the cPanel interface.  Now click on the Manage Your Account menu at the top of your screen and select Migration Information.

3. Click the Lock button to unlock your University of Kentucky account.

4. Click Get Code. Once that’s done, the system will send you an email with your EPP code.

At this stage, here are a few items to note:

  • You’ll receive a series of emails from both your old and new registrars asking you to authorize the transfer. Please act on every email you receive in a timely fashion– even if the emails look like duplicates.
  • If you do not authorize the transfer in a timely fashion, the domain transfer will expire and you will need to start over.
  • The domain must be older than 60 days.
  • The domain must have no other transfers in the last 60 days.
  • The domain transfer process can take up to a week, depending on how fast your registrars work.
  • Once the domain transfer completes, you’ll receive a notification.

What Exactly is a Web Application?

In the most general terms, a Web application is a piece of software that runs on a Web server. A Web server is a just a specialized computer designed to host Web pages.

Most Web applications are comprised of two components: files and a database. When you install a Web application, you will need to make sure all of the files are copied over into the appropriate location AND that a database (and database user) has been set up to connect to those files. Often, you will have to do some configuration to make sure the application knows how to access the database.

The system we use for University of Kentucky uses a special script installer called Installatron (in cPanel) that allows you to automatically install dozens of open source applications. When you use Installatron, you don’t need to worry about moving files, creating databases, or doing the initial configuration. It’s all taken care of for you.

In order to run on the University of Kentucky server, Web applications must be able to run on a LAMP server, which is the particular kind of Web server that we use. Occasionally, a Web application may require additional components or modules that need to be installed on the server.

Publishing Content

The primary activity that you’re likely to be doing on your WordPress site is publishing content. The content could be the text you write, pictures you take, videos or audios (which may be hosted on another site), or other media that you’ve found elsewhere on the Web. WordPress makes it very easy to publish media content of all types, whether hosted on your actual Web server or elsewhere.

Posts vs. Pages

Out of the box, WordPress provides two primary content types for you two work with: posts and pages. If you read blogs or have ever written for a blog before, the concept of a post is probably a bit familiar. Posts often are content that appear on your blog in some kind of scheduled way. They usually are presented on your site in reverse-chronological order. Posts might be what you use to share your regular thoughts, reflections, or ideas about a topic. Posts make up a kind of “river” of content that you’re producing as part of your blogging activity.

Pages usually correspond to our more traditional concept of what makes up a Web site. Pages are presented outside of the “river” of content that are posts. They are more likely to stand alone and be organized according to a traditional hierarchy. Pages might be content that is less frequently updated or changed.

If you were using WordPress to build a business Web site with a lot of information content, you would probably use Pages. If you added a feature to that site where you started to advertise special events or news, you would probably use Posts.

A few other things to know about Pages vs Posts:

  • If you want your content to be accessible to your users via RSS/syndication, you’ll need to use Posts. By default, Pages do not appear in a site’s RSS feed.
  • Categories and Tags (which are used in WordPress to help you organize your content) are ONLY available on Posts. Page organization is done by customizing your site’s menus.
  • Okay, this get’s a little tricky: WordPress, by default, also creates “Category Pages” and “Tag Pages” that display all the Posts in a category or tag. These are NOT related to the regular Page type.

Media

Upon occasion, you may want to include media (images, audio, video) in your site’s posts and pages. There are generally two approaches to handling media in WordPress:

Uploading: You can upload the files to your site’s Media Gallery and then link to them in your posts/pages. This works very well for images, and when you take this approach for images you have the added benefit of being able to make use of WordPress’ built-in (albeit rudimentary) editing tools. Also, when you upload images to WordPress, it automatically creates different sizes that you can use, as needed. This approach works less well for audio and video. In order to have your media files actually show up in a “player” (with controls for stopping, pausing, etc.) you’ll need to install a plugin. Otherwise, you’ll only be able to include links to the files. How people view/listen to them will depend a bit on the setup on their own computer and in their own browser. They may, for example, have to download the media file and then open it in another program on their computer.

Embedding: You can embed media from other sites easily in WordPress. Embedding an image just means providing a URL to its location elsewhere on the Web. Instead of uploading it to the server, WordPress grabs that image from the external source and displays it on your post/page. However, with this approach, you lose your editing capabilities as well as the resizing feature. Embedding audio and video from external sources becomes easier with every version of WordPress it seems. These days, you can embed video and audio from many external services (YouTube, Vimeo, SoundCloud, complete list here) by simply placing the full URL of the audio/video location on its own line in your post/page. There is a complete list of supported external services, and you can learn more about embedding from external sources at the WordPress site. Our general advice is to use externally hosted media whenever it makes sense and works. This is usually the case when you need to use audio or video; without plugins, well-presented audio and video in WordPress is tricky. For images, if you need to do basic editing and/or require different sizes of images, upload them to your site. Otherwise, consider referencing them from another location (your Flickr account, for example).

Post Formats

Recent versions of WordPress have built out a new “post format” feature which, if you are using a theme with the feature enabled, will style post formats differently depending on what they are. The formats that are built-in to WordPress (and are available for theme developers to use) are the following:

  • aside – Similar to a Facebook note update.
  • gallery – A gallery of images.
  • link – A link to another site.
  • image – A single image.
  • quote – A quotation.
  • status – A short status update, similar to a Twitter status update.
  • video – A single video.
  • audio – An audio file.
  • chat – A chat transcript.

Those of you familiar with Tumblr may recognize this approach to post formats.

For the most part, post formats are designed as a way to style a site (and customize styling depending on the kind of content that is being displayed). They have no special functionality, and their use depends entirely upon the theme you are using. Many older themes, for example, do not recognize post formats.

Choosing Your Domain Name

Choosing your domain name is the first step in getting started with staking your claim on the web. Your domain name is a unique Web address (e.g. yourname.createuky.net) that can be used to build out your own digital presence. As you make your choice, there are a few considerations to keep in mind:

Your Domain Name Must Be Available: Domain names must be unique, which means in order for you to claim your own, you need to be sure that it is currently available (and not being used by anyone else or any company or organization). There are lots of tools to check on domain availability, and when you sign up on createuky.net, we’ll actually check the availability of your choice for you. If you’d like to spend some time thinking about your choice and checking availability before you actually sign-up, we recommend using whois.com.

Choose a Domain You Can Live With: You should choose a domain name that you feel you can live with for quite some time. You should pick something that you won’t find embarrassing in the future. A good rule of thumb is to pick a domain that you would be comfortable putting on a future job application.

You May Wish to Include Your Name in Your Domain: There is no requirement that your domain reflects your specific identity in the form of your first and last name. However, choosing a domain name that includes your name may make it easier for you to achieve higher rankings in search engines when someone queries your real name.

Pick a Domain you Like: At the end of the day, your domain should reflect you. Pick a domain you like and are proud of. It can reflect your interests, sports you play, or your hobby. Or it could just be your name. The “right” domain for you is the one you’re comfortable with.

Plugins

WordPress has a lot of functionality built-in, but occasionally you might find a specific need that isn’t a part of the default software. To accomplish this, WordPress has a plugin architecture where developers can create plugins that add additional functionality to your site. From simple photo galleries to site statistics, to automatic Twitter and Facebook sharing of posts, there is practically a plugin for whatever you need for your blog (over 54,000 at the time of this writing). To start using and installing plugins just follow these simple instructions:

  1. Log in to your WordPress dashboard.
  2. From the left side menu, locate and click plugins.screen shot of plugin menu
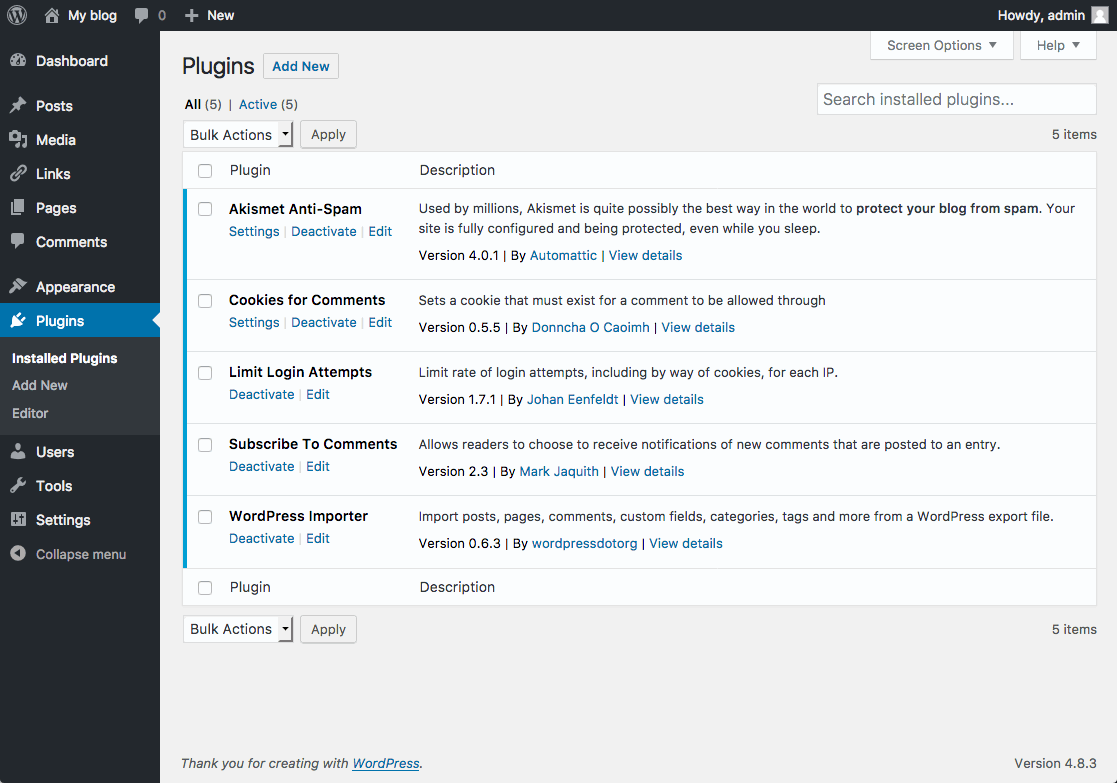
  3. You will be given a list of all your currently installed plugins. From this menu, you are able to activate and disable specified plugins by using either the single plugin options located under each plugin name. Or you may use the bulk action drop down menu to simultaneously activate/disable multiple plugins by checking desired plugins. Additionally, you may also sort through installed plugins using the sorting options above the bulk action menu.
     
  4. To install a new plugin click add new either from the plugin sidebar or the main plugin menu, you will then be redirected to a search engine where you can search using general or specific terms to find plugins. For example, searching “photo gallery” brings up various plugins from different developers.

    Once you find your desired plugin to install it hit install now, which will automatically install the plugin and prompt you if you would like to activate it now or return to the menu.find and install desired new plugins

After installing your plugin be sure to visit the developers’ website if you have any additional questions about how the plugin works, as some plugins may require certain codes or other actions to be used properly.

Some plugins will have their own settings page located under the settings or tools categories, other plugins will break out their own menu item on the lefthand side of the dashboard. Sometimes it won’t be explicit how the plugin interacts with your personal site, so it’s important to make sure you’ve read the documentation available on the plugin’s website.

Installing Themes

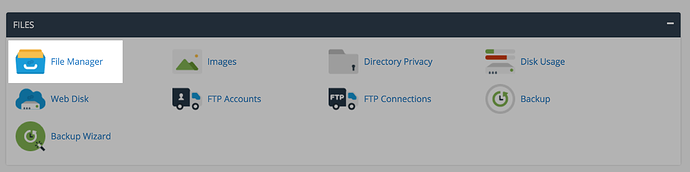
Just as you would install plugins, installing themes to Omeka is very similar. Omeka has a few themes installed automatically that you have access to. But there are more themes available at http://omeka.org/add-ons/themes. There is no automatic installer so you would need to upload the theme to your File Manager in cPanel.

Start by finding the the theme you’d like to install. Download the theme by clicking on the red button.

After, you’ll go to your specific Omeka install. Click on themes.

Click Upload.

You can drag and drop the .zip file into the window or you can click select a file.

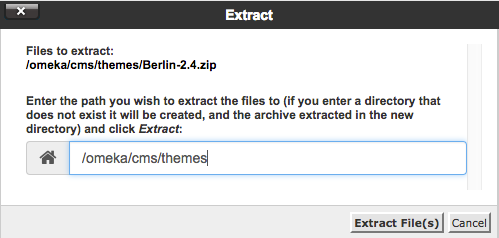
Once your file is uploaded to the themes folder you need to go in and extract the files from the .zip folder. Click on the theme file you just uploaded then click on extract.

You’ll need to confirm that you want to extract the files. Click extract files. 

Once the theme is extracted you can delete the .zip file and the theme will now be available for activation within your Omeka administration interface.